
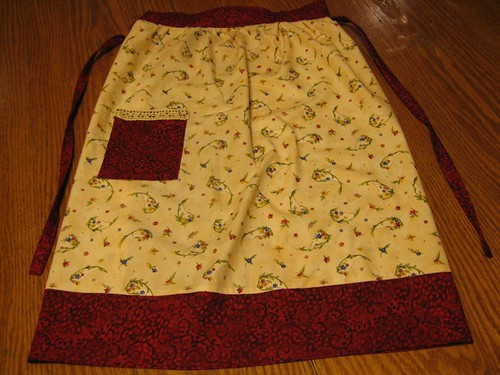
The measurements are based on a vintage apron I have. I made Grace and Emily's aprons smaller, but the steps are the same.
Materials:
1 yard cotton fabric
1/2 yard coordinating fabric
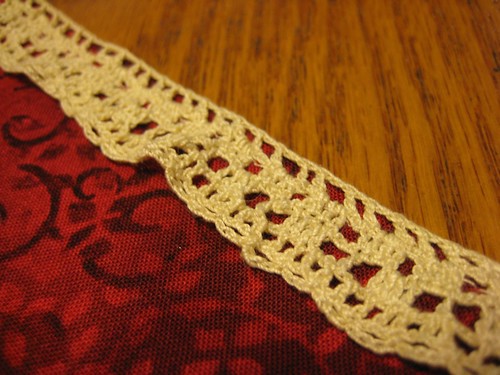
Lace or trim for pocket
Tools:
Scissors or rotary cutter and mat
Straight pins
Sewing needle or sewing machine
Thread
Iron and ironing board
Preparation:
Wash, dry and iron fabric.
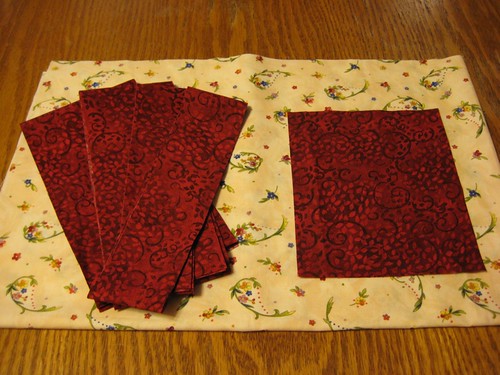
Cut out 6 fabric pieces:
Apron: 20" x 30" (main fabric)
Pocket 5" x 6" (coordinating fabric)
Bottom strip: 4" x 30" (coordinating fabric)
Top strip: 4" x 19" (coordinating fabric)
Apron strings: 2 of 2" x 30" (coordinating fabric)

1. Place bottom of apron and bottom strip fabric right sides together. Secure with pins.
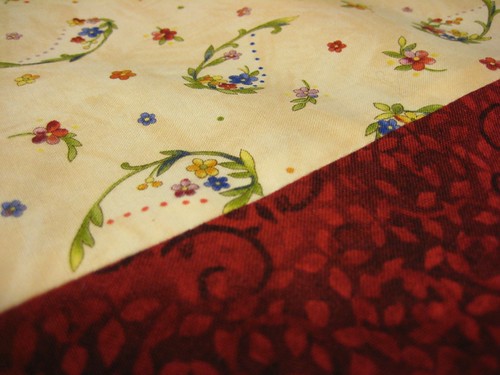
2. Sew using 1/4" seam allowance. Remove pins and iron seams.
3. Fold over the top edge of pocket 1/2" and iron.
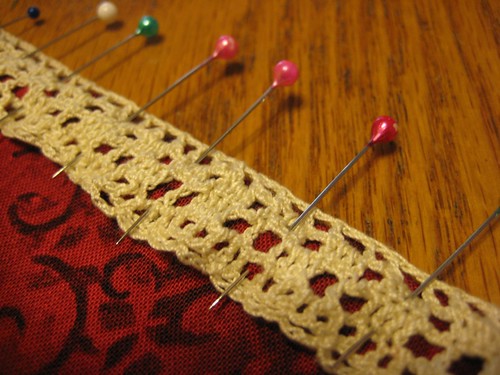
4. Pin lace or trim to top edge of right side of pocket.
5. Sew in place. Remove pins.

6. Fold over remaining three edges of pocket 1/4" and iron in place.

7. Pin to front of apron 5" from left side and 10" from the bottom. Sew. Remove pins.

8. Fold over and iron the seams 1/2" along both sides and bottom of apron. Pin in place.
9. Sew using a 1/4" seam allowance, but stop 1/2" from top on both sides.
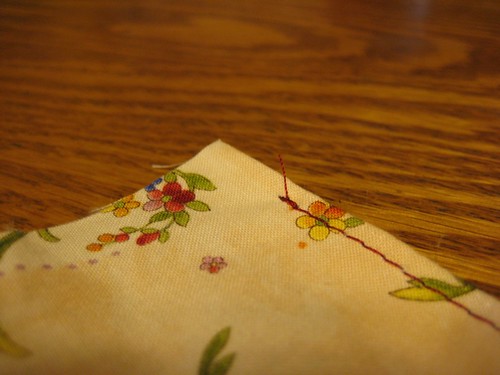
10. Using your machine's longest stitch, sew a basting stitch 1/2" from the top edge, leaving a long tail of thread at both ends.
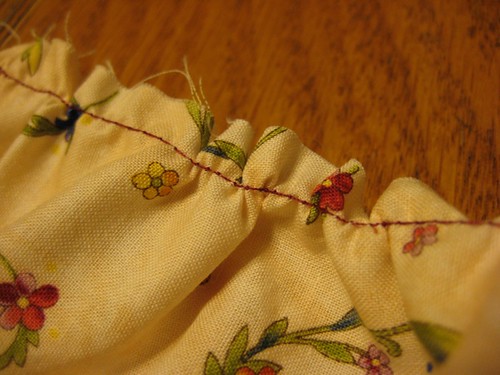
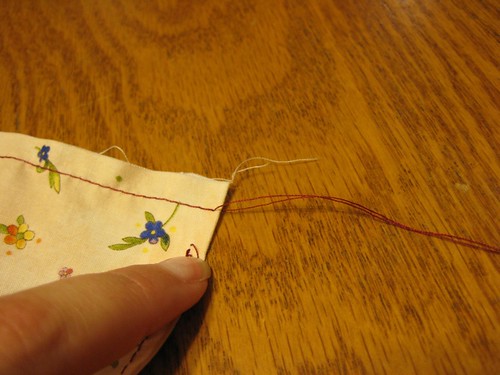
11. Pull the top thread carefully, gathering into a slight "ruffle," until the top measures 18 inches in length. Tie a knot on each end. Set aside.

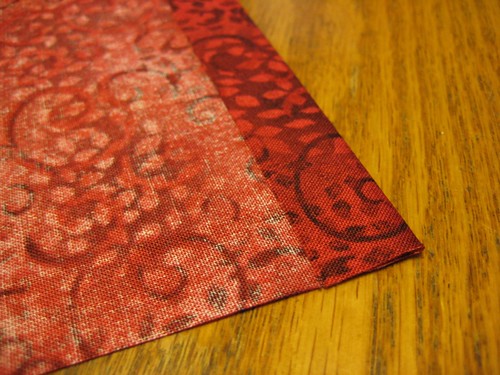
12. Fold over and iron lengthwise seams 1/4" on top strip.

Fold in half and iron.
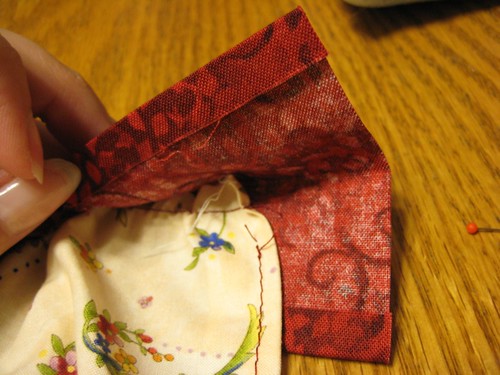
Slip gathered top of apron inside top strip, leaving 1/2" on each end.
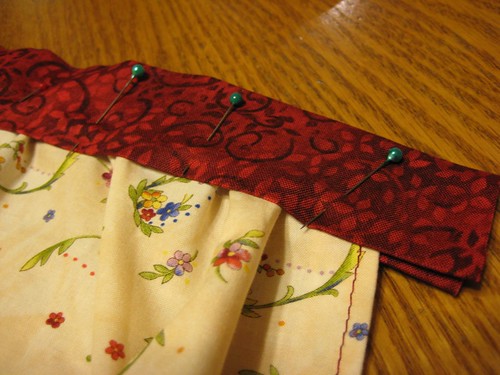
Pin in place. Set aside.
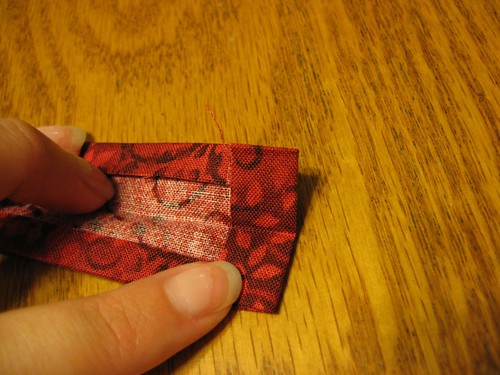
Fold over and iron the lengthwise seams and one end, 1/4" on apron string fabric.
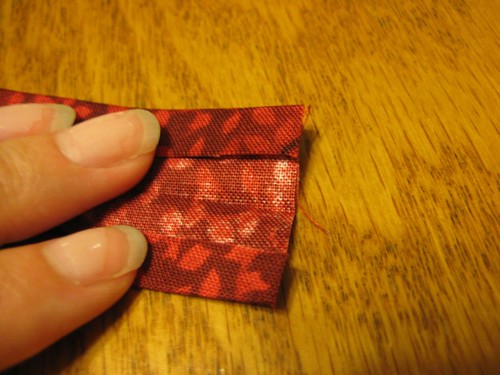
Do not fold the other end.

Fold strip in half and sew along folded edges.
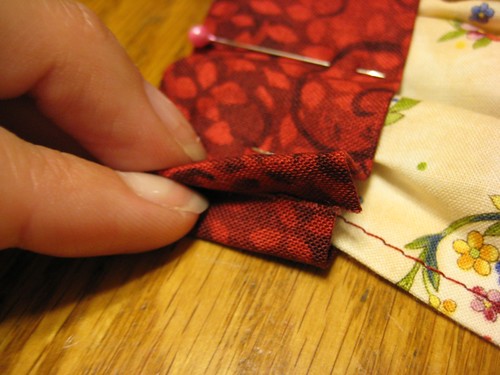
Fold in the seams of top strip sides 1/4".
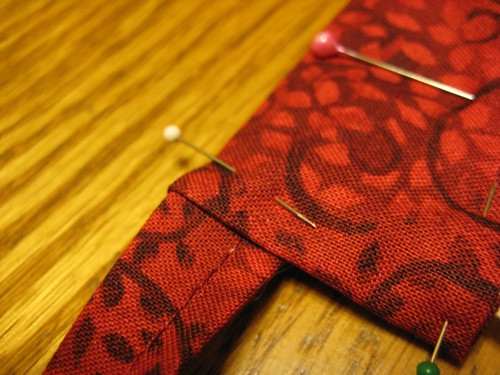
Slip unfolded end of apron string in 1/2". Secure with pins. Repeat with remaining apron string.
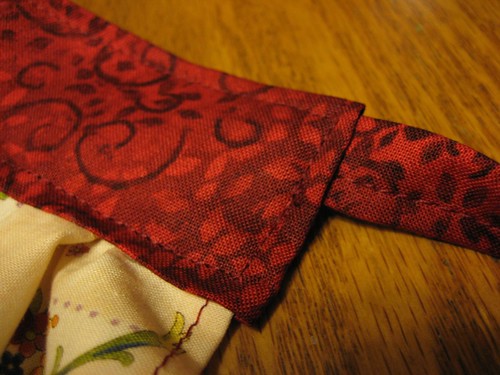
Sew along all 4 sides of top strip 1/4". Your apron is finished!
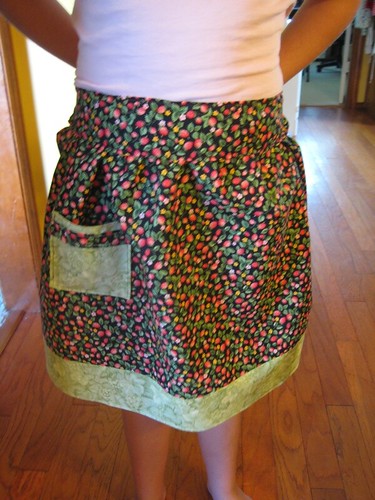
You can get different looks for your apron, depending on the fabric you use.

Double pocket.

Ruffled bottom trim.
Let me know if you make one, too. I'd love to stop by and take a look!
Good Morning Kelli,
ReplyDeleteThank you, thank you for the tutorial. I'm going to make these for my nieces for Christmas. I'll let you know when I'm done. It will probably be around C-mas though.
Brandee :-)
Great tutorial Kelli - very simple and straightforward! That's my kind of sewing! I am in desperate need of some new aprons, but I need the total cover up kind since I am a really messy cook! I manage to get stains everywhere - it's a gift I guess.
ReplyDeleteThis must be the day for tutorials - I posted one too! Mine is a simple tassel tutorial, since they are so fun to make and quite easy too!
Enjoy your day - and thanks for sharing your inspiration!
Great tutorial , the apron is so cute!!
ReplyDeleteDiane
Thank you so much for sharing your ways. I want to make one so bad. I think I'll have to wait a little, I'm so BUSY!
ReplyDeleteI love the aprons. Thank you for the tutorial Kelli. Kathi
ReplyDeleteCan you just come over and bring your sewing machine or better yet we can go to momma's and use hers and she will make us lunch on the deck...come on...I know you want to come over and make my apron..i have no creative bone in my body...lol....you are very talented..i envy that.
ReplyDeleteHi Kelli, I never get tired taking about aprons. I have a small collection and love them.
ReplyDeleteYour tutorial is great. I need to make a couple for everyday use and this will really help me. Hugs, Linda
p.s. Your school room is the best...it would be a pleasure to be schooled here.
If I knew how to sew, I would definitly use your instructions to make one...too easy! :-)
ReplyDeleteHope you are having a safe week!
God Bless,
Dawn
Thank you for the tutorial Kelli! Making an apron has been on my "want to do" list for some time now. It doesn't look too difficult :-)
ReplyDeleteManuela
Oh Kelli, thank you for this tutorial. It is like you are right there. :-) I actually think I might could do this one day with your help. I am not a seamstress, though I would love to learn. There is no way I could buy a pattern and make an apron completely on my own, but with your tutorial I just think I might try it. :-) You are very gifted!
ReplyDeleteI never get tired of Aprons. This one is cute. I love the colors you have chosen.
ReplyDeleteThank you so much for the tutorial. It seems very easy and straightforward. I think one of these is in my future!
ReplyDeleteVery nice, thanks!
ReplyDeleteWhat a great tutorial, Kelli! I love all of the fabrics that you chose.
ReplyDeleteLovely!!! BTW-How could anyone ever get tired of hearing about aprons? I LOVE aprons!! I usually wear the full ones b/c I'm messy, but I love your tutorial! More wonderful gift ideas...
ReplyDeleteAwesome! You've just inspired me to try my hand at sewing again - literally! I think I will hand-sew one of these. Hopefully I will get to it soon and can show you the results.
ReplyDeleteElizabeth :)
Very nice apron! Believe it or not I just started to wear one! I kept ruining my clothes whenever I would cook and finally pulled out a really pretty one that came with the new pots and pans my husband gave me for Christmas...I know, not too romantic, but they were so needed and a really nice set that should last until I die...Wish I could sew like you!
ReplyDeleteThanks for the excellent tutorial. You are so generous with your time and talents. Julie
ReplyDeleteYou make it look so easy...if I tried I would be at the hospital. The doctor would have to try and figure out how to remove the sewing machine from my hand!!!! LOL. You have much talent Kelli.
ReplyDeleteThank you so much for posting this. I was just looking at an apron in the store thinking I would really love to have one. I am going to go get some fabric right away and try this!
ReplyDeleteYou make it look so easy but I just know I'd ruin it! lol It's a shame that my mom didn't pass on her sewing skills to me. She used to make all our clothes while growing up and although I've tried to make a few things, it's been a disaster. All I do now is hem pants!!! xoxo
ReplyDeleteWow! I'm most amazed by how long it must have taken to photograph each step for your tutorial!
ReplyDeleteThanks for the instructions.
That's so chic, Kel!
ReplyDeleteHow cute are these! I love your girl's names! ...sweet names! :) Your school room looks great! That was a neat idea to use a cassette holder for the ribbon holder! ~Rhonda :)
ReplyDeleteThis is an awesome post. I was looking for Christmas gift ideas for the ladies in my world. I just added this one to the list. Thank you!
ReplyDeleteI'm bookmarking this so I can make it later. It's really neat. I have a lot of projects I want to work on first, but this one's on the horizon. thanks Kelli
ReplyDeleteohh I loved this, makes me want to run to the sewing room & whip one up LOL but gotta focus on Annies, quilts etc with a show coming up in a few weeks lol humm perhaps I need one to keep change in that'd work right? LOL LOL
ReplyDeleteI love the apron...you are so talented in everything you do!
ReplyDeleteThanks for entering my 100th post giveaway and good luck to you!
Rondell
What a great tutorial! You made it seem (no pun intended) so easy.
ReplyDeleteI'm glad you shared how to make an apron without going out and buying a pattern, and it's super cute, too! I have to find some special fabric so it stands out and I will give it a whirl!!! Thanks =)
ReplyDeleteThanks for the lesson and now I see just why you are such a good teacher. Your girls are so lucky to have you as a mother and teacher. Enjoy the school year........all of you.
ReplyDeleteThanks for the tutorial, Kelli! I plan to use it for Christmas!
ReplyDeleteThank you for the specific instructions on how to do this. I tlooks pretty simple - fabric choice is most important too!
ReplyDeleteHappy new school year to you as well!
Hi Kelli,
ReplyDeleteYour tutorials are so clear and helpful - thank you for sharing.
I love the setup in your school room too. You are such an organized Mom and teacher!
Blessings.
Hi Kelli,
ReplyDeleteThanks so much for giving us the tutorial and providing all the helpful tips. I can't wait to put my vintage fabrics to good use!
Kate
Kelli,
ReplyDeleteYour apron is lovely. The first apron I ever made was on Grandma's treadle sewing machine. For some reason I don't manage the modern machines well, but did love sewing on that one.
Enjoyed my visit. Be sure to drop over to my Writing Nook and enter my Harvest Giveaway.
Blessings,
Mary
Lovely aprons and wonderful detailed instructions on making them. That is very thoughtful of you.
ReplyDeleteThank you, thank you, thank you! :)
ReplyDeleteI think it's so wonderful how you have such a heart to share what you learn with others. :-)
ReplyDeleteYou give such easy to read and see directions. I am going to try this with my 13 year old daughter. She wants to learn to sew and unfortunately I can't. Thanks for the pictures too. Cheryl
ReplyDeleteThanks for the great link! I made such an amazing apron!!! I wish I could add a picture of mine for you to see! :)
ReplyDelete