
Today, I am sharing our corn husk dolls. In our Faith Keeper's group, we are working on our American Heritage badge and all of the girls wanted to make dolls for the craft project.


Lots of busy hands! Here is what you will need to make your own dolls:

~Corn husks (found in the produce department of many stores. I found them in the Latin foods section at Walmart.)
~String
~Scissors
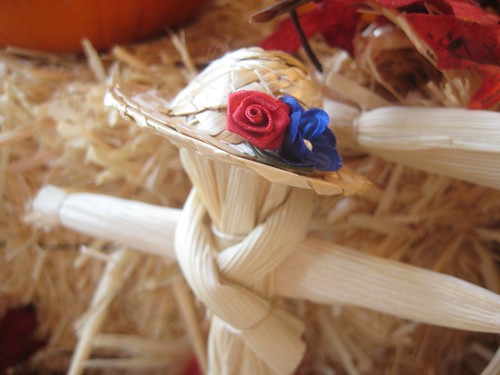
~Hats and tiny flowers are optional (I found them at Hobby Lobby)

You will need 6 husks for each doll. Soak husks in sink or bowl of warm water until they are soft and bendable. This takes about 15 minutes.
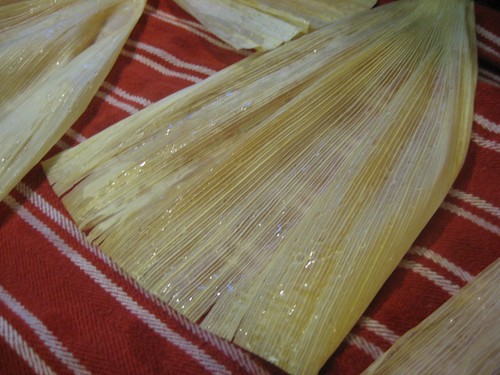
Lay husks on towel. You will need to make your doll while they are still wet.

Choose four husks about the same size and lay them down on top of another.
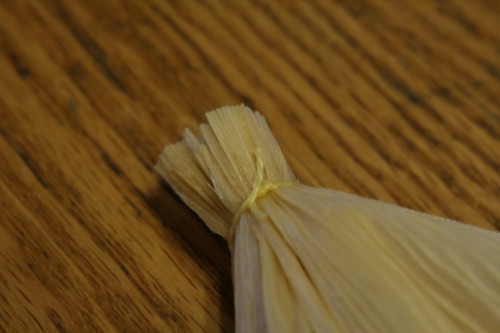
Tie the pointy ends together close to the top. It helps to have a buddy when making the dolls. Make sure you get the string very tight and tie several knots. Trim ends.
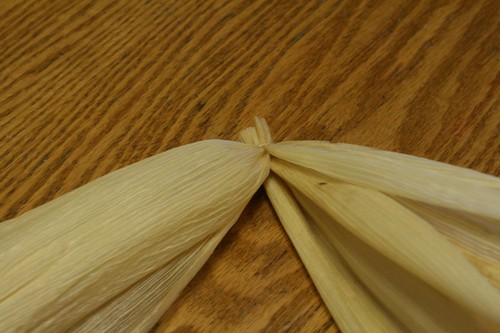
Separate the husks into two sections (two husks in each hand) and flip them over so that the string is inside.

This forms the doll's head.
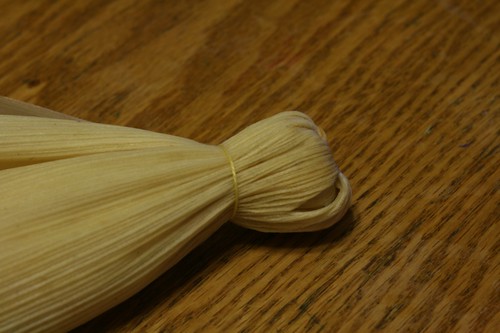
Tie a string around the husks to make the head.
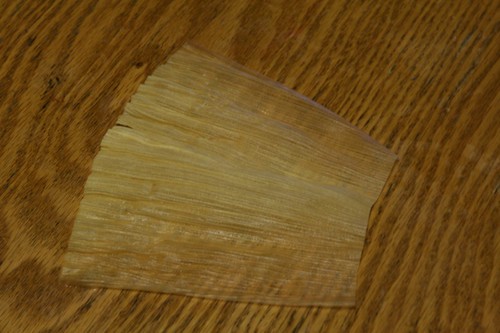
Take another corn husk and smooth it flat. Trim the pointed end straight across with scissors.
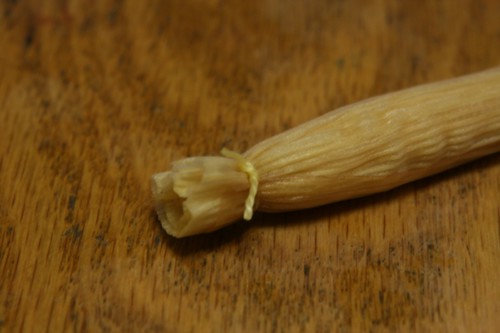
Roll the husk into a tight tube and tie each end of tube with a piece of string. This forms the arms.
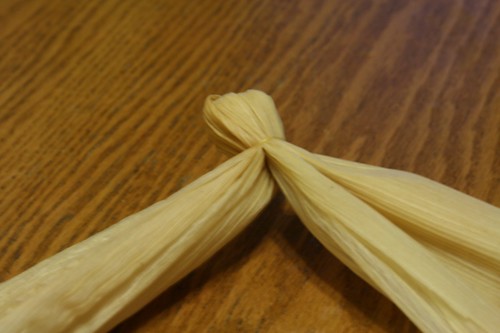
Separate the husks again (two in each hand).
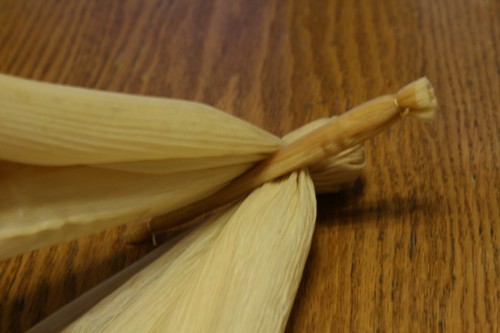
Place the tube between the body husks, right below the head, so that an arm sticks out on each side.
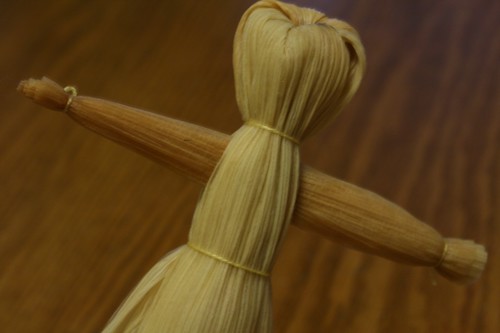
Make a waist for the doll by tying a piece of string around the body husks below the arms.
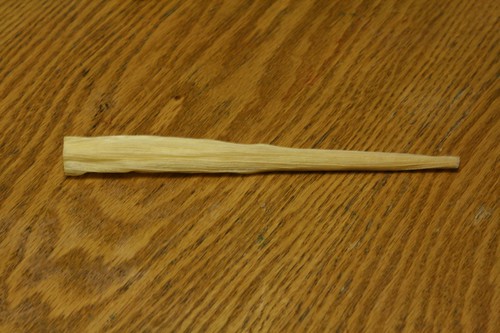
Take another husk and roll up, loosely.
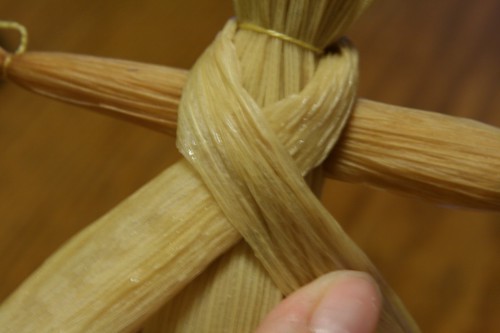
Warp it around the back of the neck and criss-cross across the chest.

Bring back around to the back and secure with string.

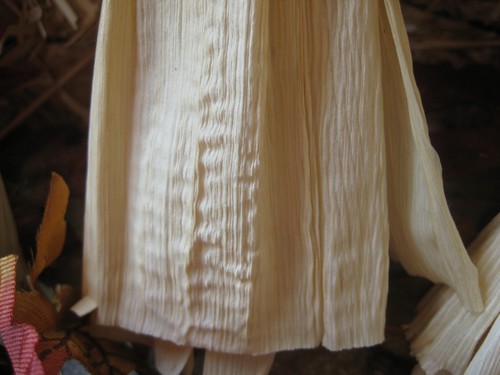
Your doll is finished and should have a beautiful corn husk skirt. Set aside to dry.
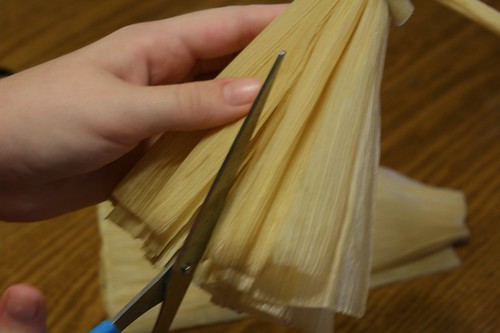
You can also make pants by cutting up the center of husks.
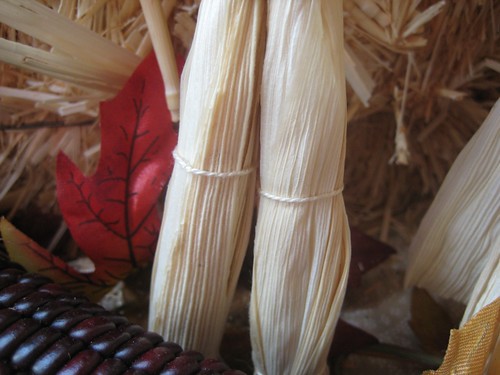
And tying string at the ankles and knees.
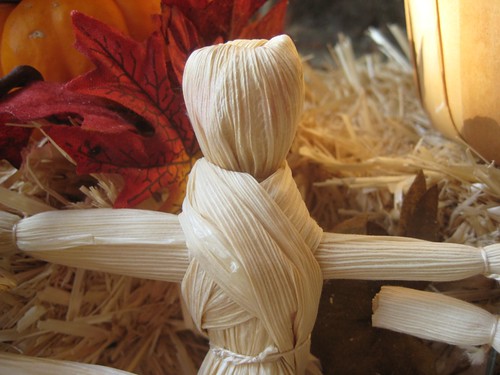
Corn husk doll faces are usually left blank, but we added a little blush to their cheeks.
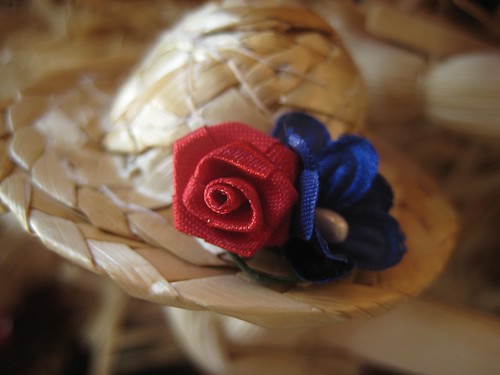
We also gave our dolls tiny straw hats decorated with flowers.
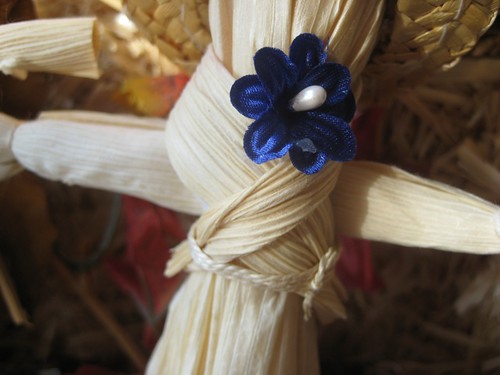
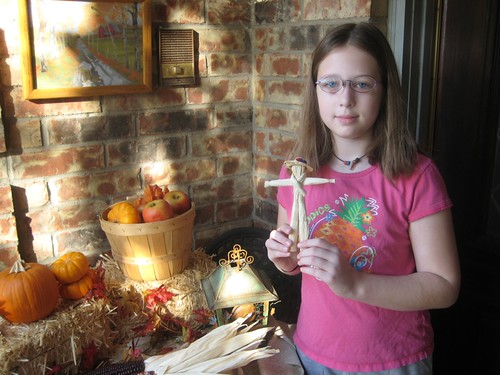
Grace and her doll.
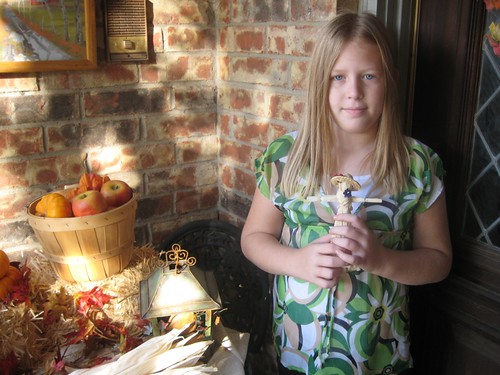
Emily and her doll.
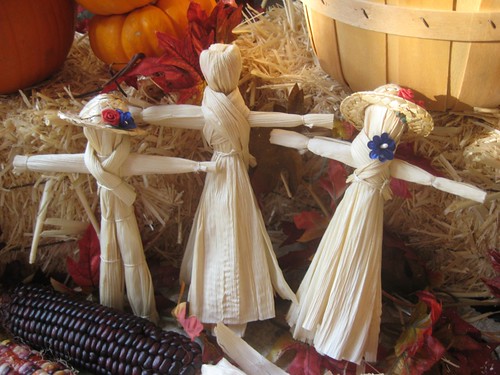
Thank you for taking a look and let me know if you make some, too. They would be so cute added to a Thanksgiving centerpiece or place even card holders!

That is SO adorable! My girls would absolutely love making this...
ReplyDeleteMy grandmother actually told me she really did have a corn cob doll that she played with when she was little, and I was always amazed...
This one is so cute!
Hi Kelli
ReplyDeleteThose corn husk dolls are really special. Your beautiful daughters look so proud of their dolls. My daughter and I would love to try making some too. Thanks for the clear instructions and inspiration once again.
Hope you are feeling much better.
Have a lovely week.
Lindsay
These dolls all turned out charming, Kelli. My congratulations to the girls on their lovely work.
ReplyDeleteYour instructions are wonderful, thank you!
Kelli great turorial of corn husk dolls! You are a born teacher!
ReplyDeleteLove the girls too!hugs
tsk tsk..I meant tutorial..did you catch that one!
ReplyDeleteMy daughter would love making this. Thank you for the step by step instructions, Kelli!
ReplyDeleteAbsolutely adorable--I'm off to WalMart to get some corn husks. The grandchildren will love playing with them at Thanksgiving!
ReplyDeleteBig big sympathy re migraine- I got one of my bad bad headaches yesterday, still have it today, so that means no tv, or internet - I am visiting only for a few mins...no reading... it is awful! so hope yours is better soon!!
ReplyDeleteThe dolls are really neat...great project to do with your daughters!
ReplyDeleteHi Kelli,
ReplyDeleteI'm so sorry you had a migraine this weekend! :-( Glad you are feeling better. Thank you so much for the instructions for the corn husk dolls - I have always wanted to make some!
Thanks for sharing..Kendall and I will have to make some of those dolls!
ReplyDeleteLove the dolls. Thanks so much for sharing this. I can make these with my granddaughter! Have a blessed day!
ReplyDeleteJuanita
Kelli, thank you for always sharing your many talents with us bloggers. The corn husk dolls are adorable.
ReplyDeleteHow adorable. I have to share this with my daughter who lives in Minnesota. She always is looking for things to make with her kids. Thanks for sharing this Kelli.
ReplyDeletei always wanted to know how to make thoes! Gillian saw the pictures, and she wants to make one too! Thanks for including the instructions.
ReplyDeleteHappy Fall!
Christina
wow, these are outstanding!
ReplyDeleteThey are so adorable! I remember making simular dolls when I was in Girl Scouts, only we used cloth. If I get a chance I may use that craft for my Sun. Sch. class for Thanksgiving. :o) Thanks for sharing!
ReplyDeleteI hope you are feeling better as the week starts. Migraines are no fun.
ReplyDeleteI love the corn husk dolls. I think I will do these with my granddaughters as they would love the project. Your instructions make it very clear on how to assemble one. Thanks
The girls look so proud of their dolls. I am so glad that you are passing all of your talents onto them.
These are adorable! Thanks for posting this. It is a great idea for a cold fall day indoors!
ReplyDeleteYep, I remember making those dolls. Only, mine didn't look as cute as your do. Good work!
ReplyDeleteI will be stopping by again, but have a wonderful week!
Blessings,
Elizabeth
These are so sweet and brought back some memories. Thanks for the detailed instructions.
ReplyDeleteT
What a fun idea! :)
ReplyDeleteGosh these are so cute Kellie! Thanks for the instuctions on how to make them. Now I just have to find some corn husk to make some.
ReplyDeleteHi Kelly,
ReplyDeleteI'm so glad that I reached your blog from your Etsy store.
I love corn but I must admit that I never thought that a corn cob should be turn a lovely doll:) Thanks so much sharing.
Hope you're feeling better, take care of yourself.
Rengin, in Istanbul
Good ideas, we have a 4 and 2 year old, so I will have to do something like this when they are older.
ReplyDeleteGreat project!
ReplyDeleteDiane
I just love them and I am sure that the children had fun putting them together. Thanks for the lesson.
ReplyDeleteI think these dolls are absolutely perfect for Thanksgiving. I love the addition of the hat and flower!
ReplyDeletei hope you are feeling better. The dolls are so cute and the pictures of the girls are priceless.
ReplyDeleteMore coincidences, Kelli, I have a Keepers at Home Club for 8-12 year old homeschooled girls that meets here at my home!! We just finished a counted cross stitch project, and some of the girls entered them in the fair. Sounds like if we were in the same town we'd be buddies! :)
ReplyDeleteThese dolls are adorable!! You do such a great job on all that you do! Thanks for sharing.
Becky
How cute! What a great way to add to fall decor :) Thanks for sharing! (Thank your daughters too ;))
ReplyDeleteYou've probably already received this, but I got the "uber awesome blog" award and I'm giving it to you too because your blog is one of my favorites :) (See my blog for more if for some odd reason you've haven't been given this award yet)
These are adorable.
ReplyDeletePrecious!!!
ReplyDeleteThank you so much for posting these directions! I've been wanting to make some of these with my girls.
ReplyDeleteThe corn husk dolls turned out great, I still have the dolls I made 20 years ago! Brought back a lot memories.
ReplyDeleteHow cute! i made those when I was in Girl Scounts!!
ReplyDeleteThose turned out so cute! I hope you are feeling beter today! Tiyr sweet gift came in the mail Saturday, what a treat! Thank you so much!
ReplyDeleteKelli,
ReplyDeleteThey are so cute! You are so gifted by God! Thank you for sharing.
Miriam :)
Those are so cute. The hat and flowers added just the touch to make them pop.
ReplyDeleteKelli,
ReplyDeleteYour corn husk dolls are so darling! Thank you for sharing your tutorial with us!
Gina
Oh, I remember making these when I was a young girl (eons ago)...thanks so much for the memories...thanks for the button code too! I have it posted and am looking forward to your post...
ReplyDeleteBlessings,
Susie
Hi Kelli. I usually use those corn husks for tamales and making dolls out of them looks like so much fun. You know that the hair the husks have in them is usually red and that can be used as hair for the dolls. Its not really hair, but it is inside the husks of the corn when picked. Very nice. Thx.
ReplyDeleteThese are so sweet! I think it's really great that you involve your kids in creativity. I think it's so important in addition to their education and you're probably just as great of a teacher as you are a baker and crafter!
ReplyDeleteThose are wonderful!
ReplyDeleteVERY sweet! My 2yo decided she wanted a corn-husk DOG! And the patient old ladies at the American Revolution re-enactment made her one!! It's so stinking cute, too.
ReplyDeleteThanks for your clear instructions and tutorials. I made those caramel apple cards for favors for a fall party recently. They were so adorable.
Those dolls are so cute...and so are your girls. :)
ReplyDeleteEvening, Kelli! Oh, thank you for the wonderful instructions on how to make these little adorable dolls. I have always been amazed and wondered how they were put together!
ReplyDeleteBe a sweetie,
Shelia :)
Kelli,
ReplyDeleteI love these, Acelia would love to make them. They would look good on my mantle with my fall leaves. Thanks for sharing.
Love Kerri
Adorable just adorable!!!! I cannot wait to do our weekly shopping to get these corn husks!!! My daughter will love this, thank you Kelli for another awesome idea!!!! I had never heard or seen this one before, I am thrilled!
ReplyDeleteWhat is a Faith Keepers group?
ReplyDeletethose are just too cute!
ReplyDeletethanks for all the detailed photos :)
I have always wanted to make those, but never took the time. It's nice to know that the husks are readily available.
ReplyDeleteThe dolls turned out adorable! Thanks for the instructions, I might have to try my hand at them!
ReplyDelete~emily
The dolls are adorable - and they even wear hats. We had a children's activity at our annual Canal Era Day the first Saturday of October. The children make corn dolls but they are not nearly as sophticated as yours. Your instructions are so concise and easy to follow. Thanks for a great post.
ReplyDeleteHugs,
Sweetie
Oh what fun! I remember (a long time ago!) making something like this for my Girl Scout troop.
ReplyDeleteYOur girls are beautiful! I know that you're so proud of them.
They are precious! I had a corn husk doll when I was little. I will be printing this off to make with my girls!
ReplyDeleteSo cute! Such a fun craft for little girls. Thanks for sharing!
ReplyDeleteI am very new to your blog, and am truly enjoying your tutorials! The dolls are so dear!
ReplyDeleteWhat sweet little corn husk dolls. You always give such good detailed instructions for making all the neat things you share. I really appreciate your thoughtfulness.
ReplyDeleteHugs,
Charlotte
Hi Kelli,
ReplyDeleteI am sorry for your headache. I hope one day they have a good cure for migraines. I will lift you up in prayer though.
Your corn husk dolls are darling - thank you for sharing.
~ Barb
I want to make those so bad. How precious.
ReplyDeleteI love them.
The dolls are beautiful. I'm sure your girls are going to have wonderful memories of all the special things you do with them! Have a great day!
ReplyDeleteThose are awesomely cute! Great tutorial! I bookmarked it for if we ever want to make some.
ReplyDeleteI'm sorry for being so late in commenting - this week has been very busy. Actually, this month has been pretty busy!
ReplyDeleteThank you so much for this tutorial! Of course now I MUST try this! Where did you find the hats?
so cool!!!!!!!!!!!!!!!!!!!!!!!!!
ReplyDeleteNow I know what corn husks are since English is not my first language. Now I know what beautiful things I can do with them when I buy fresh corn. Thank you for the excellent explanations.
ReplyDelete