
My Top 10 Card Making Essentials list is HERE.
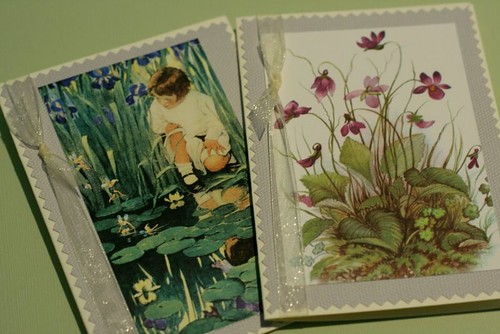
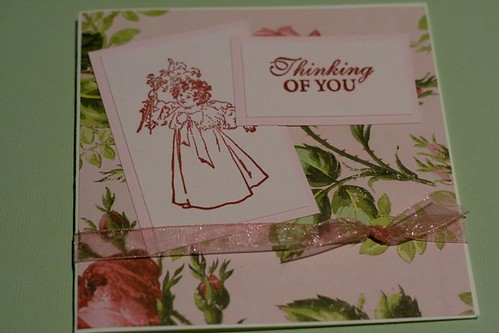
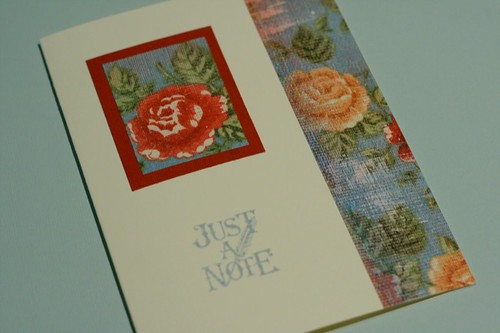
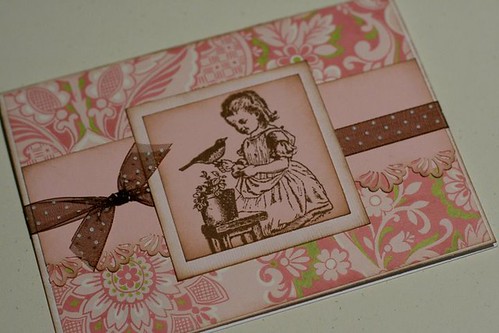
~Step-by-step Instructions~
~Step-by-step Instructions~
~Step-by-step Instructions~
~Step-by-step Instructions~
~Step-by-step Instructions~
~Step-by-step Instructions~
~Step-by-Step Instructions~
~Step-by-Step Instructions~
~Step-by-Step Instructions~
~Step-by-Step Instructions~

~Step-by-Step Instructions~

~Step-by-Step Instructions~
~Step-by-step instructions~
Step-by-step instructions
~Step-by-step instructions~
Step~by~step instructions
Step~by~step instructions~
Step~by~step instructions

Step~by~step instructions
Step~by~step instructions

~Step-by-step instructions~
~Step-by-step instructions~
~Step-by-step Instructions~
~Step-by-step Instructions~
~Step-by-step Instructions~
~Step-by-step Instructions~
~Step-by-step Instructions~
~Step-by-Step Instructions~
~Step-by-Step Instructions~
~Step-by-Step Instructions~
~Step-by-Step Instructions~
~Step-by-Step Instructions~
~Step-by-Step Instructions~
~Step-by-step instructions~
Step-by-step instructions
~Step-by-step instructions~
Step~by~step instructions
Step~by~step instructions~
Step~by~step instructions
Step~by~step instructions
Step~by~step instructions

~Step-by-step instructions~
~Step-by-step instructions~
~Step-by-step instructions~
~Step-by-step instructions~
~Step-by-step instructions~
~Step-by-step instructions~
~Step-by-step instructions~
~Step-by-step instructions~
~Step-by-step instructions~
~Step-by-step instructions~
 ~Step-by-step instructions~

~Step-by-step instructions~
~Step-by-step instructions~
~Step-by-step instructions~

~Step-by-step instructions~
~Step-by-step instructions~

Recycled Notecards
~Step-by-step instructions~

Coupon pocket cards
 ~Step-by-step instructions~
Paper napkin notecards
~Step-by-step instructions~

~Step-by-step instructions~

~Step-by-step instructions~
Step-by-step instructions~

~Step-by-step instructions~
~Step-by-step instructions~
~Step-by-step instructions~

~Step-by-step instructions~
~Step-by-step instructions~
~Step-by-step instructions~

Step-by-step instructions~
~Step-by-step instructions~
~Step-by-step instructions~
~Step-by-step instructions~
~Step-by-step instructions~
~Step-by-step instructions~
~Step-by-step instructions~
~Step-by-step instructions~
~Step-by-step instructions~~Step-by-step instructions~
~Step-by-step instructions~
~Step-by-step instructions~
~Step-by-step instructions~
~Step-by-step instructions~
Recycled Notecards
~Step-by-step instructions~
Coupon pocket cards
~Step-by-step instructions~Paper napkin notecards
~Step-by-step instructions~
~Step-by-step instructions~
~Step-by-step instructions~
Step-by-step instructions~
~Step-by-step instructions~
~Step-by-step instructions~
~Step-by-step instructions~
~Step-by-step instructions~
~Step-by-step instructions~
~Step-by-step instructions~
Step-by-step instructions~
Plenty of inspiration here! Thanks for posting the links Kelli! I hope some of your creativity rubs off on me!:-o)
ReplyDelete~Kalianne
That's a lot of cards!
ReplyDeleteI love making them, too. Now, to just do it! Thanks for sharing your wonderfulness with us.
Those are really some nice cards. I wish I had the patience to cut things out. I may try it one day, but I normally make my cards online and just print. Beautiful and fancy cards you have.
ReplyDeleteKelli,
ReplyDeleteWhat beautiful cards....you are so talented! Looking forward to seeing more!
Tammy
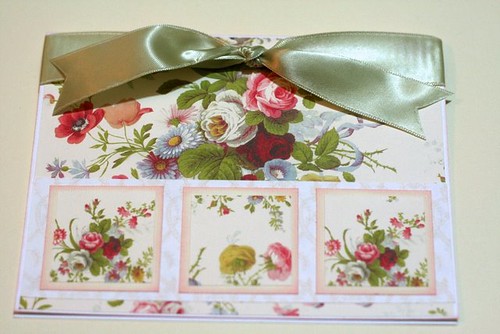
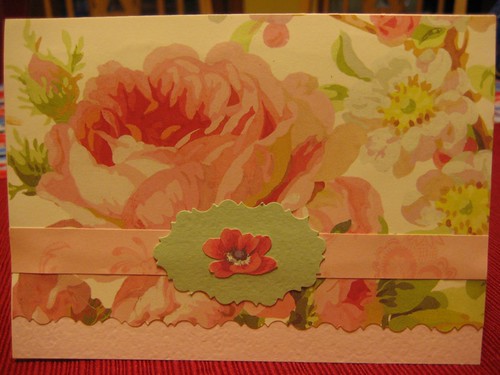
Such lovely cards. My favorite is the one with the rose.
ReplyDeleteAlfazema
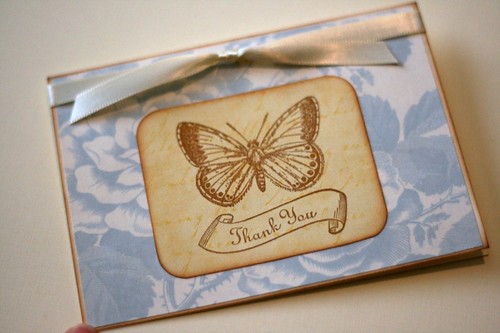
What beautiful cards! You know I was just thinking this morning on what I wanted to do for Christmas cards this year, and what I came up with was putting three (or two if three won't fit) wallet-sized family photos on the front, kind of like you did with the last card with the butterflies. Thank you for the extra inspiration! :)
ReplyDeleteYou took alot of time on this...thanks for sharing this with us.
ReplyDeleteThank you for putting this all in one post; what a great resource for all of us! :o)
ReplyDeleteYour home and your art are works from the Lord. I'm so glad you stopped by my blog--so I could find yours!
ReplyDeleteOh, Kelli,
ReplyDeleteI'm in love with some of these and all are beautiful. The little teacup pockets are so much fun and I'm inspired!
Love,
Nancy
They are all beautiful. I especially love the last one, lol. I have it sitting in my kitchen. ;-)
ReplyDeleteLove your cards!
ReplyDeleteI need to get cracking I have so much stuff I recently bought but I haven't started to make anything ... no time...
Diane
dear kelli, thank you so very much for the lovely card inspirations. they are so pretty! you are so gifted :D i am definitely going to try my hand at them. (:
ReplyDelete- ira
Making greeting cards is one of my favorite things to do, thank you for posting your beautiful cards and instuctions.
ReplyDeleteI am so over the top impressed with all your cards.
ReplyDeleteQuestion:
What do you use to cut the scallops and circles that are just a bit smaller than each other for the layered look?
Do you have punches for all those shapes??
Also, you refer to cutting a slit in the edge of the card to put ribbon through.
Does the ribbon show on the inside then?
Thanks for all your sharing, and blessings,
Barbara Jean
Thanks Kelli, I have it bookmarked.
ReplyDeleteMama Bear
Oh, this makes me want to get in my car and go down to Michael's right now! Our Senior Group at church saves the fronts of greeting cards sent to them, glue them onto co-ordinating cardstock and I guess they buy envelopes at discount. Sometimes a card shop owner will donate them. They resell these card for a very minimum fee(less than $1)that money goes to a specific mission project. If you can't use all of the greeting card, maybe you can use some of it. Glue it to a piece of colorful cardstock and finish it off. Helps stretch the budget a bit too!
ReplyDelete*you are amazing !*
ReplyDeleteI am truly amazed at the beautiful cards I just saw here tonight. I have just started making cards and many of yours are so easy.
ReplyDeleteSue
Hi....I'm from Indonesia.
ReplyDeleteReally really love this tutorial.
What a wonderful cards... Thank you for sharing this tutorial.
nuhy2005.blogspot.com
Fabulous!!! here is a lot of beautiful reeting cards its inspireable i like it...
ReplyDeletePlastic Business Cards
Plastic Business Cards
Plastic Business Cards
Thanks alot your cards are great and show a lot of creativity.
ReplyDeleteThanks for the great cards they show a lot of creativity and i will scraplift some of them and put my own spin on them. Thanks again.
ReplyDeleteHi Kelli,
ReplyDeleteLove the cards Hun, what would be advice for the newcomers? (me!! Lol)
Your cards are absolutely beautiful!
ReplyDeleteYou are so kind to share all of these beautiful card!! Thank you!
ReplyDeleteBeautiful cards and very good design.. Even I a m fond of customized cards to send my closer ones. Good work!!!
ReplyDeleteThis comment has been removed by a blog administrator.
ReplyDeleteThis comment has been removed by a blog administrator.
ReplyDeleteThis comment has been removed by a blog administrator.
ReplyDeleteThis comment has been removed by a blog administrator.
ReplyDeleteThis comment has been removed by a blog administrator.
ReplyDeleteThis comment has been removed by a blog administrator.
ReplyDeleteThis comment has been removed by a blog administrator.
ReplyDelete